I’m Saraemi (@saraemiii_EN), an illustrator who also creates VTuber models.
VTube Studio is a software that lets you sync your Live2D avatar with your real-life movements through a webcam.
It’s perfect not only for streaming, but also for recording sessions and even video meetings.
In this article, I’ll walk you through how to install and set up VTube Studio, using real screenshots to guide you step by step.
VTube Studio is an incredibly popular app among VTubers it runs smoothly, offers detailed customization, and works on both Mac and Windows.
What You Can Do with VTube Studio
Here are some of the key advantages that make VTube Studio stand out from other similar software.
- Works on both Windows and Mac
- Easily imports Live2D models
- Offers commercial use, such as monetized streams, with a one-time DLC purchase
- Lets you use your iPhone or Android as a tracker instead of a webcam (paid option)
Works on Both Windows and Mac
While many similar programs only support Windows, VTube Studio runs smoothly on both Windows and macOS, giving you flexibility no matter your setup.
Easy Live2D Model Import
Importing your Live2D model is simple just open the designated folder within the app and drop in your model data.
While advanced settings are available, you can get your model moving with just a few basic steps.
Monetized Streaming with a One-Time DLC Purchase
To monetize your streams on VTube Studio such as Super Chats, memberships, or ad revenue you’ll need to purchase a DLC.
The rules used to allow free monetization, but they’ve since changed. Still, since it’s a one time payment and not a subscription, it’s an excellent deal.
DLC options include.
・Removing the VTube Studio watermark
・Enabling collaboration streaming
Just purchasing one of these will unlock the features you need.
Use Your iPhone or Android Instead of a Webcam (Paid Option)
With a dedicated mobile app, you can use your smartphone as a tracking device instead of a webcam.
Since iPhones have high quality cameras, this allows for more precise motion tracking.
The app costs but it’s well worth it for those seeking smoother facial and motion capture.
What You Need for VTube Studio
- Webcam or a smartphone
- Microphone if you plan to talk during streams
- Live2D VTuber model
About Live2D VTuber Model Data
You can obtain a Live2D VTuber model by creating one yourself, commissioning an artist, or purchasing a premade model.
I offer custom VTuber model commissions, and I also sell affordable, general-purpose models that anyone can use on VGen.
A typical Live2D VTuber model consists of the following files and folders
- A folder like ◯◯◯.4096 containing PNG assets
(the number may vary depending on the model) - ◯◯◯.moc3
- ◯◯◯.cdi3.json
- ◯◯◯.model3.json
- ◯◯◯.physics3.json
- ◯◯◯.vtube.json (exported from VTube Studio / optional)
- items_pinned_to_model.json (exported from VTube Studio / optional)
- ◯◯◯.exp3.json (expression data / optional)
- ◯◯◯.motion3.json (animation data / optional)
When installing your model into VTube Studio, you simply place the entire folder containing these files into the designated directory.
You won’t need to handle or arrange each file individually.
Steps to Start Using VTube Studio
- Install Steam and create an account
- Install VTube Studio
- Load your Live2D model data into VTube Studio
- Adjust a few basic settings and you’re ready to use the software
There are several steps to go through before you can fully operate VTube Studio, but as long as you follow the process, it’s very easy for anyone to get started.
How to Install VTube Studio
To install VTube Studio, you’ll need to use another application called Steam.
Let’s start by installing Steam first.
1.Install Steam and Create an Account
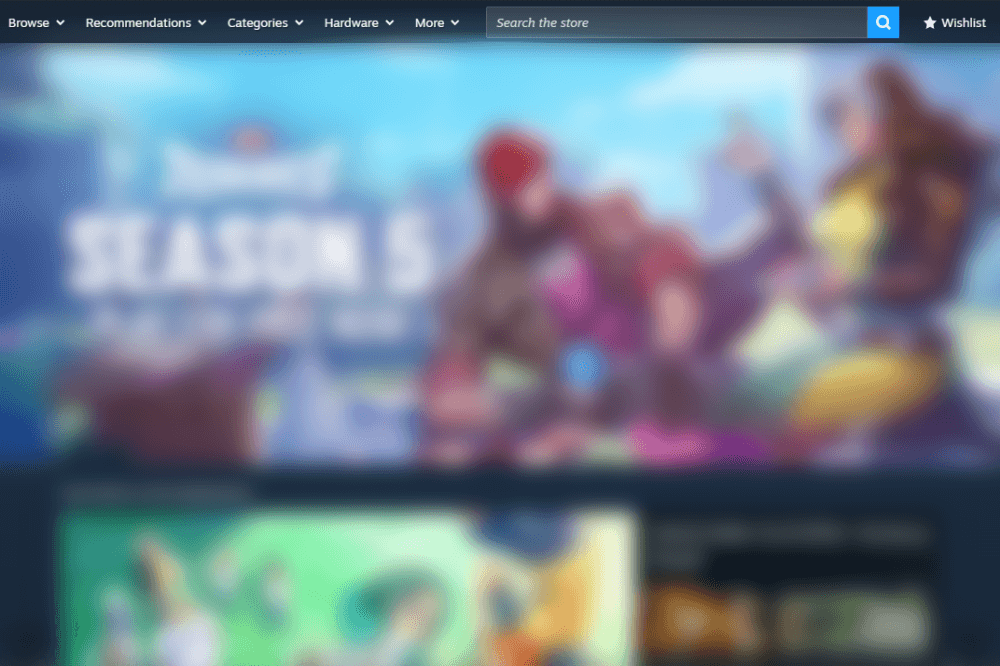
Go to the Steam official website using the link below.

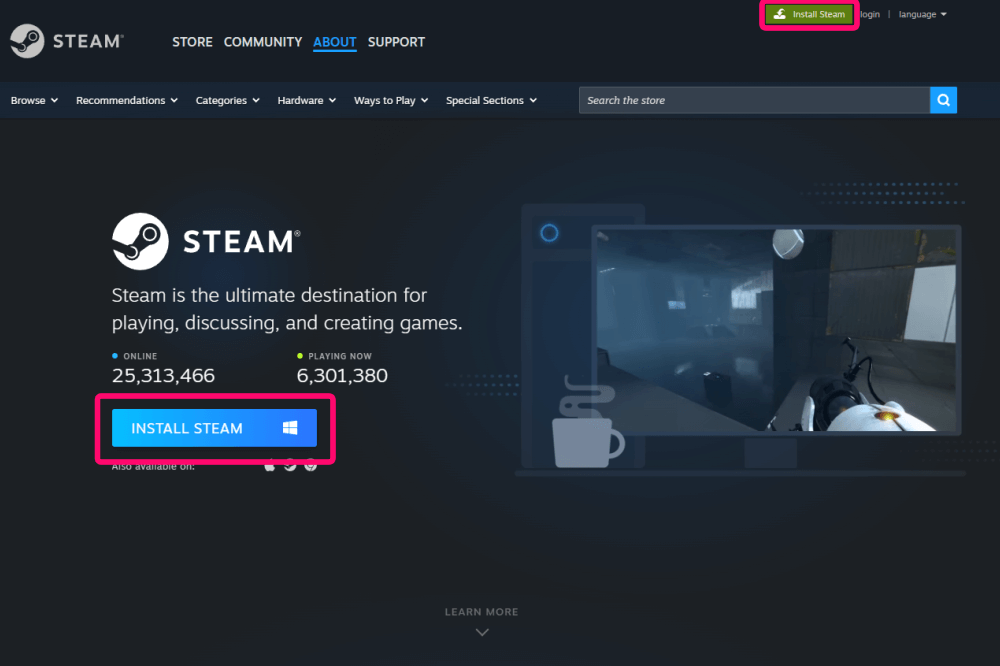
Once you’re on the homepage, click “Install Steam” to download SteamSetup.exe.
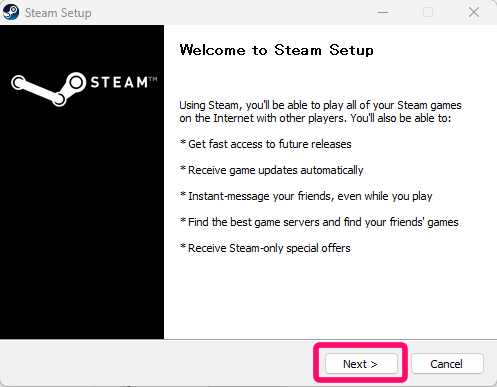
Double-click the downloaded SteamSetup.exe, and the setup window will appear.
Click “Next.”
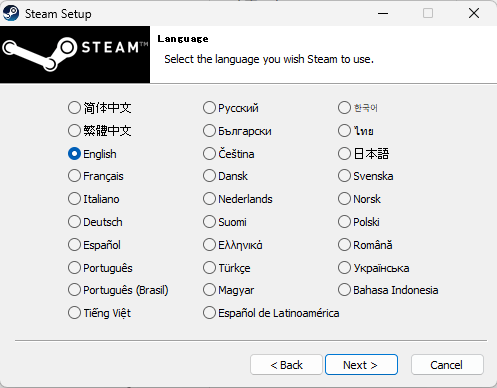
Select your language and click Next.
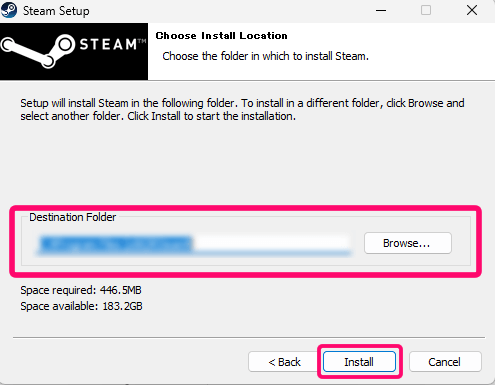
Choose your installation folder, then click “Install.”
Once the installation is complete, Steam will launch automatically.
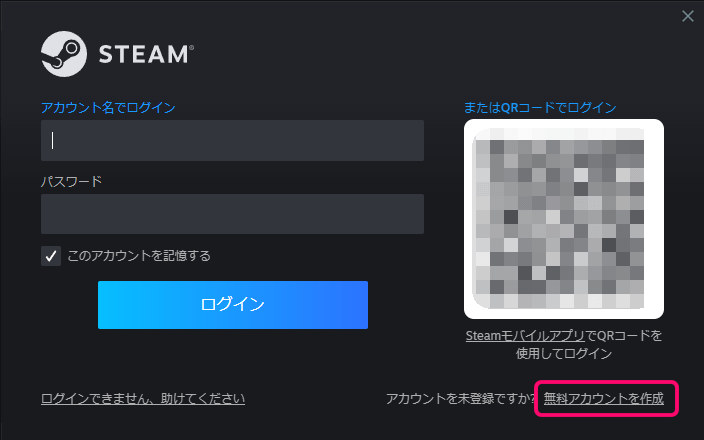
To create a new account, click “Create a Free Account” in the bottom-right corner.
Enter your email address and click “Continue.” A verification email will be sent to you.
Open the link in the verification email, and you’ll be taken to the account creation page.
Fill in the required fields to register your account.
2. Download and Install VTube Studio
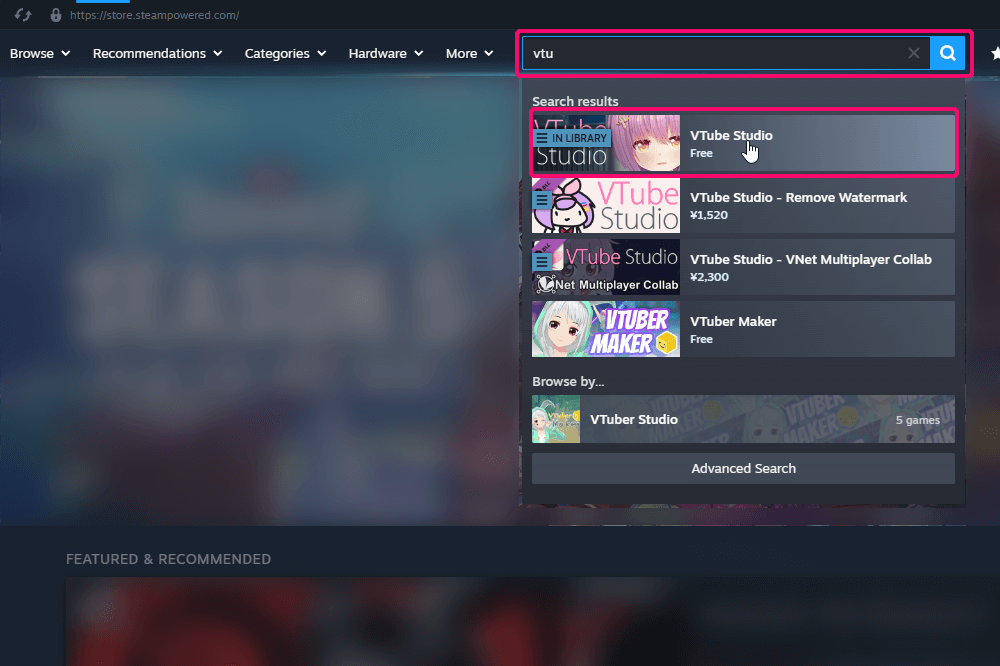
Once you’re logged in to Steam, go to the VTube Studio page.
Steam has a huge number of applications, so the easiest way is to use the search bar and type “VTubeStudio.”
Several related results may appear, but click on the free version of “VTube Studio.”
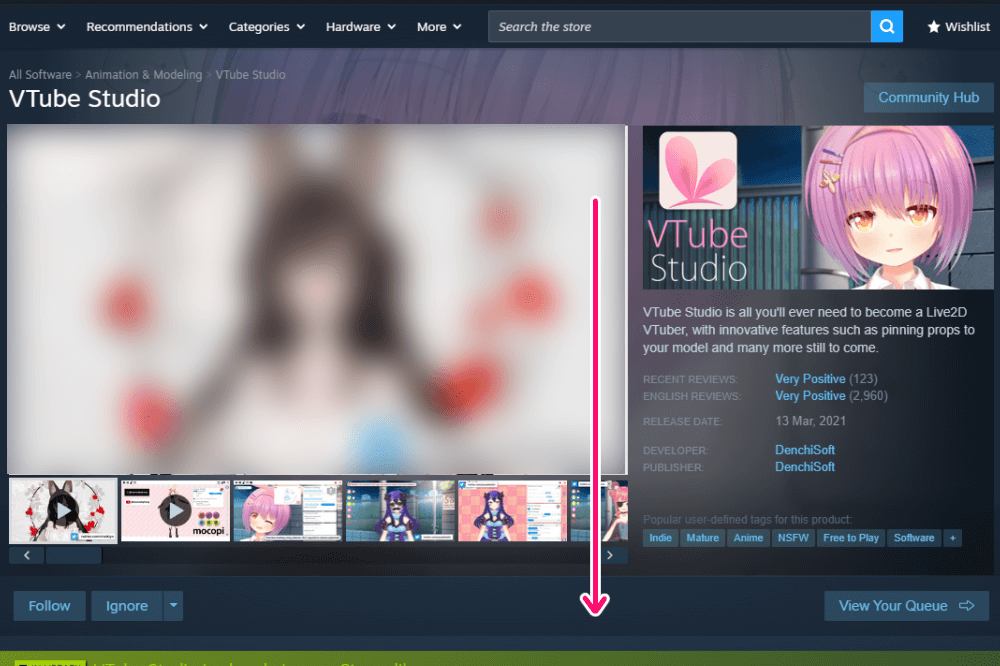
After opening the VTube Studio page, scroll down.
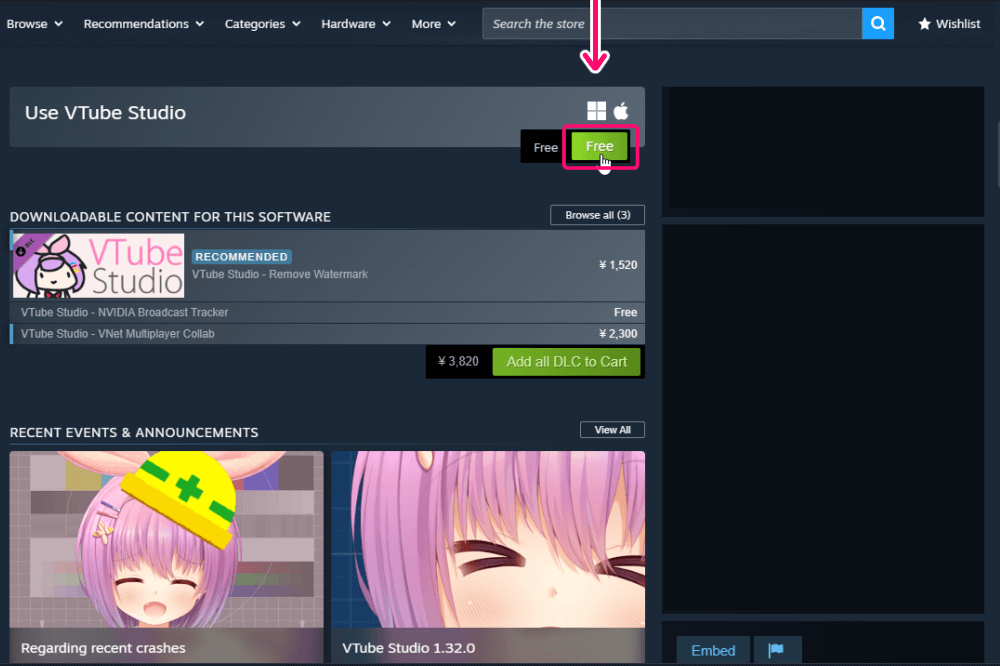
Click “Use VTube Studio” to start downloading and installing the software.
Once the installation is complete, a VTube Studio icon will appear on your desktop or in your Start menu, and you’ll be able to launch the application from there.
Importing Your Live2D Model into VTube Studio
Before importing the model, let’s switch the interface language to make the process easier.
1. Change the Language Settings in VTube Studio
Launch VTube Studio, then double-click anywhere on the screen to open the menu on the left side.
A speech bubble icon will appear in the upper right corner.
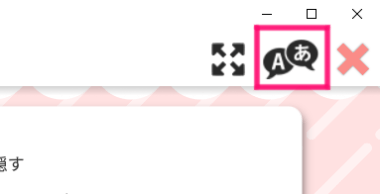
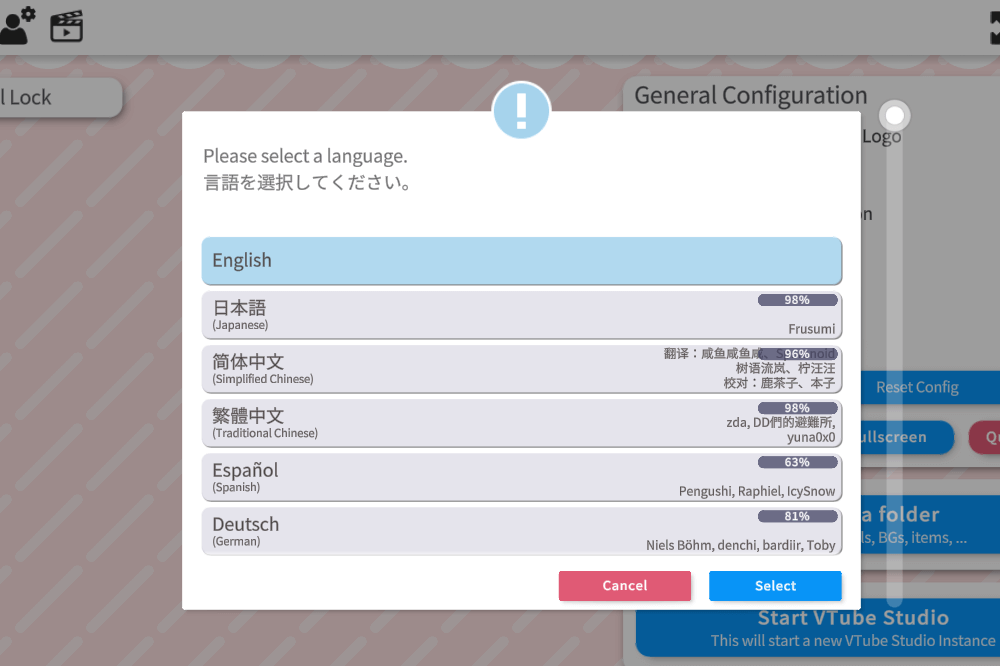
Click it to open the language selection window.
2. Import Your Live2D Model into VTube Studio
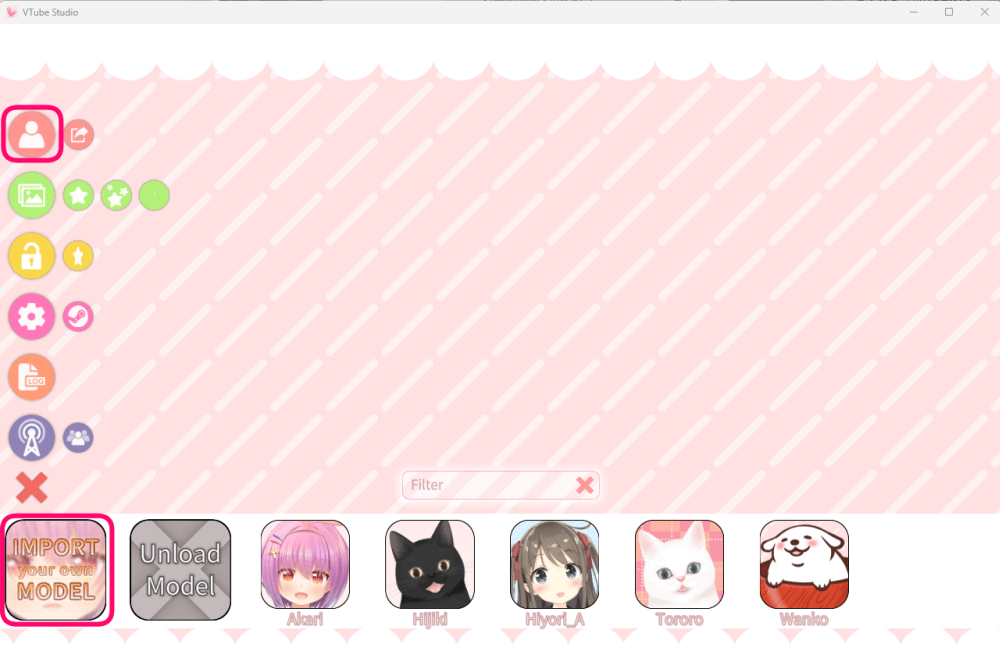
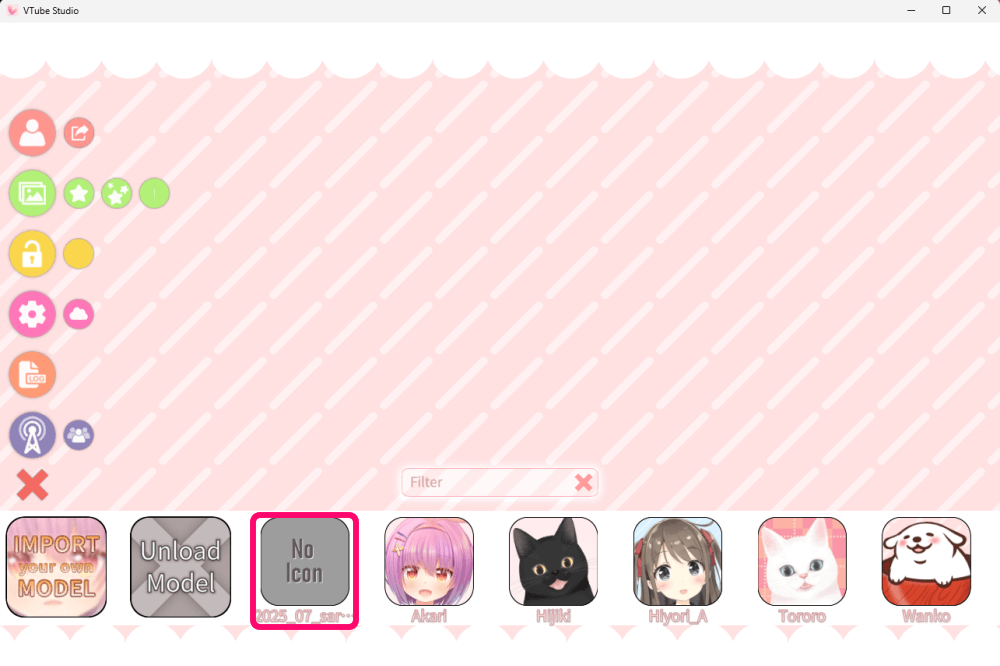
You’ll see an option labeled “Import Your Own Model.”
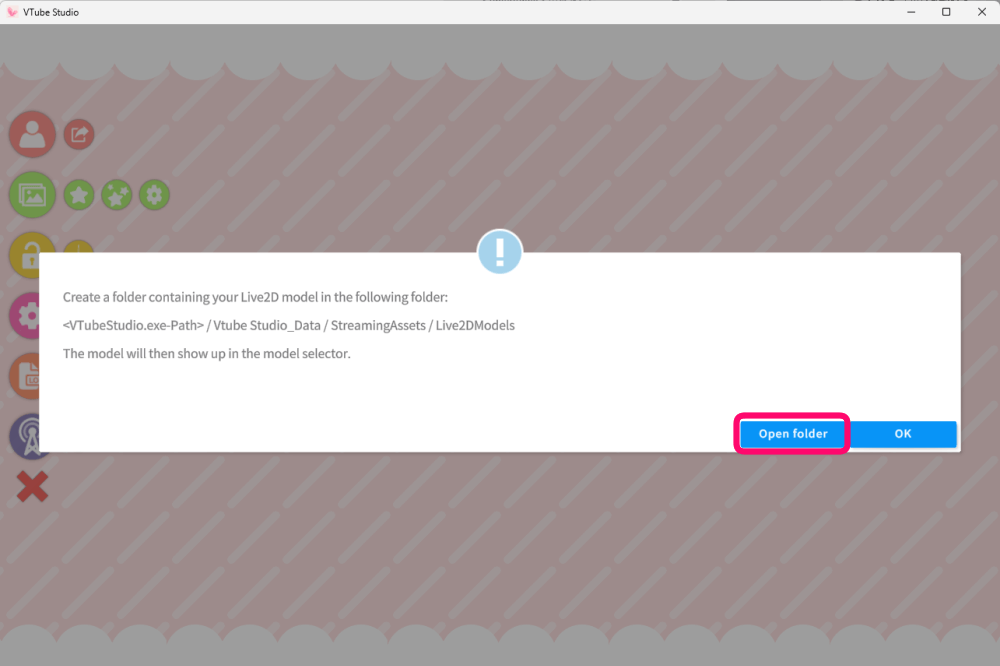
Click “Open Folder,” and the storage directory for models will appear.
Place your entire Live2D model folder into this location.
To prevent data loss, I recommend using copy & paste rather than moving the original folder.
After adding the model data, restart VTube Studio.
3. Select Your Camera and Adjust Your Model’s Movement
At this stage, your model will appear but won’t move yet.
To enable tracking, you need to connect the model to your camera.
Then go to Camera Tracking Settings to continue.
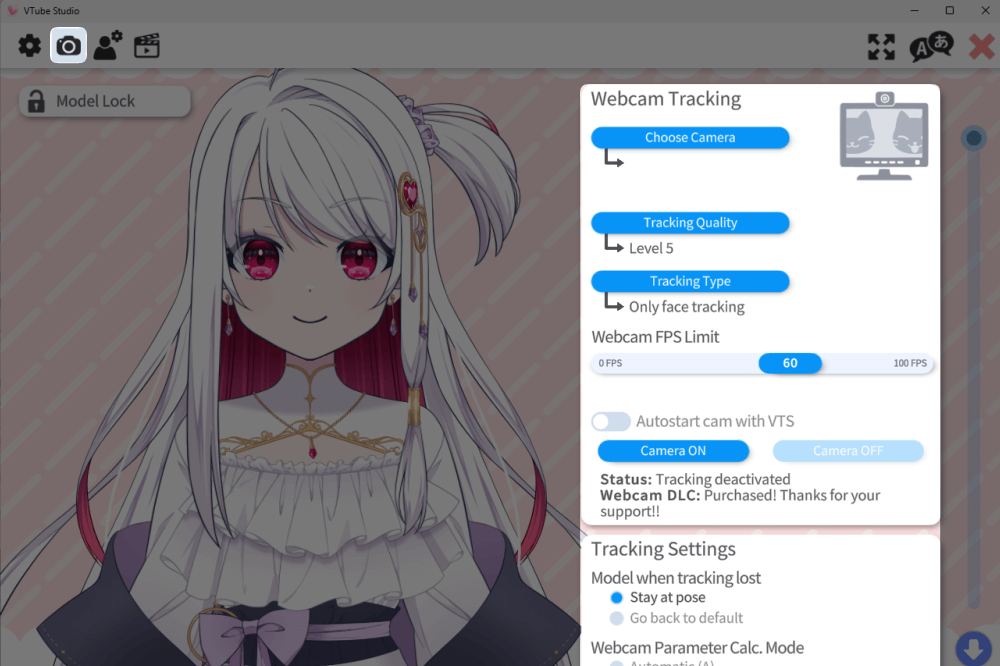
Click the camera icon to open the Webcam Tracking Settings panel.
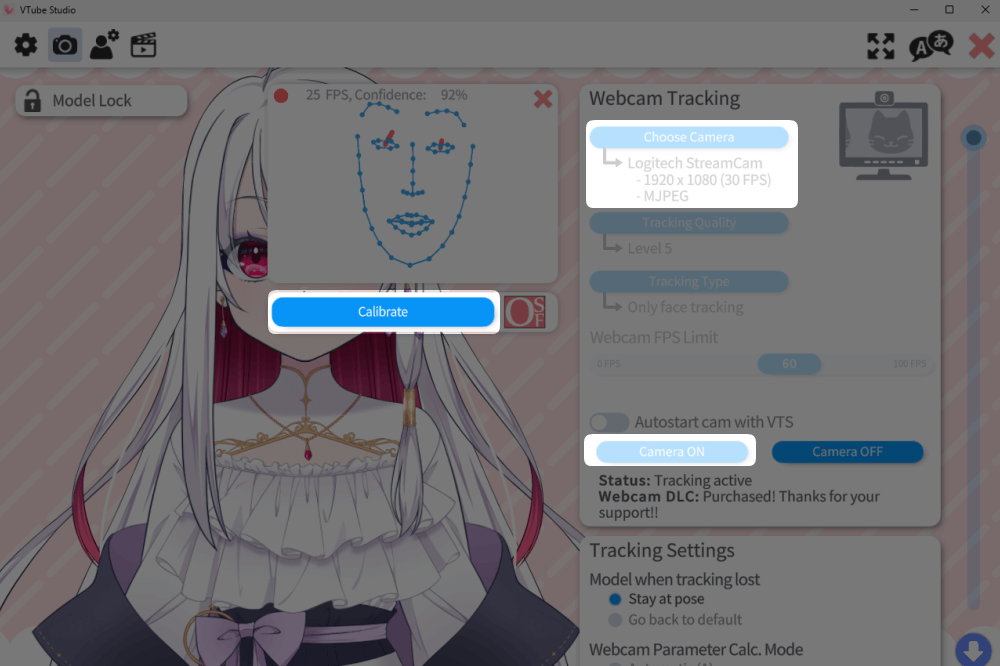
Under “Select Camera,” choose the webcam connected to your PC, then switch Camera ON.Your face should now appear on the preview screen.
Click “Calibration” to link your movements to the model.
At this point, your VTuber model is ready to use, but next I’ll explain some detailed settings and useful controls.
Basic Operations in VTube Studio
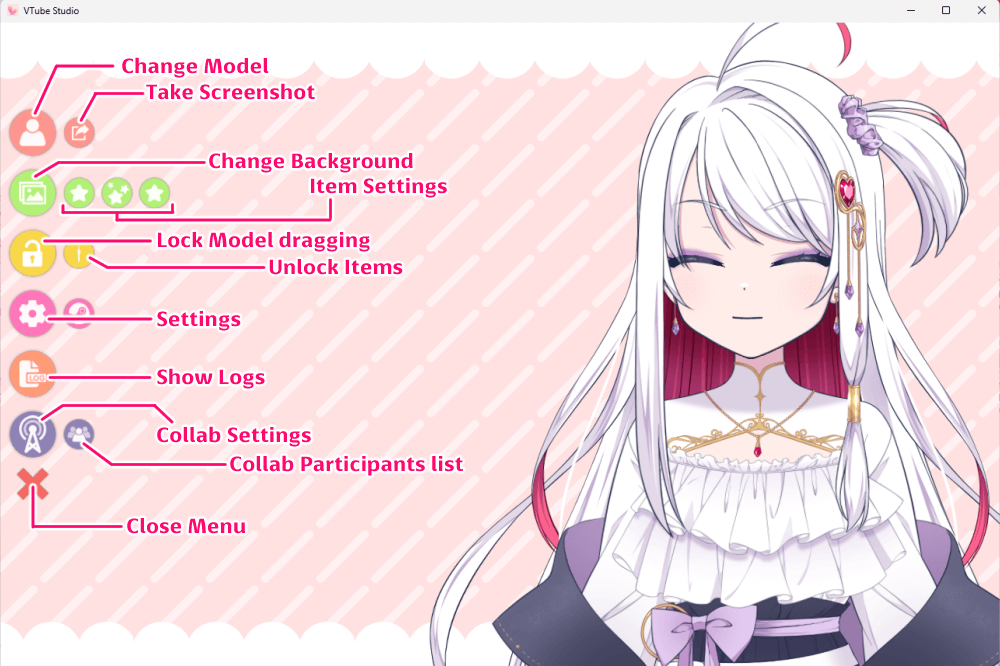
When you first launch VTube Studio, you’ll see a simple menu on the screen.
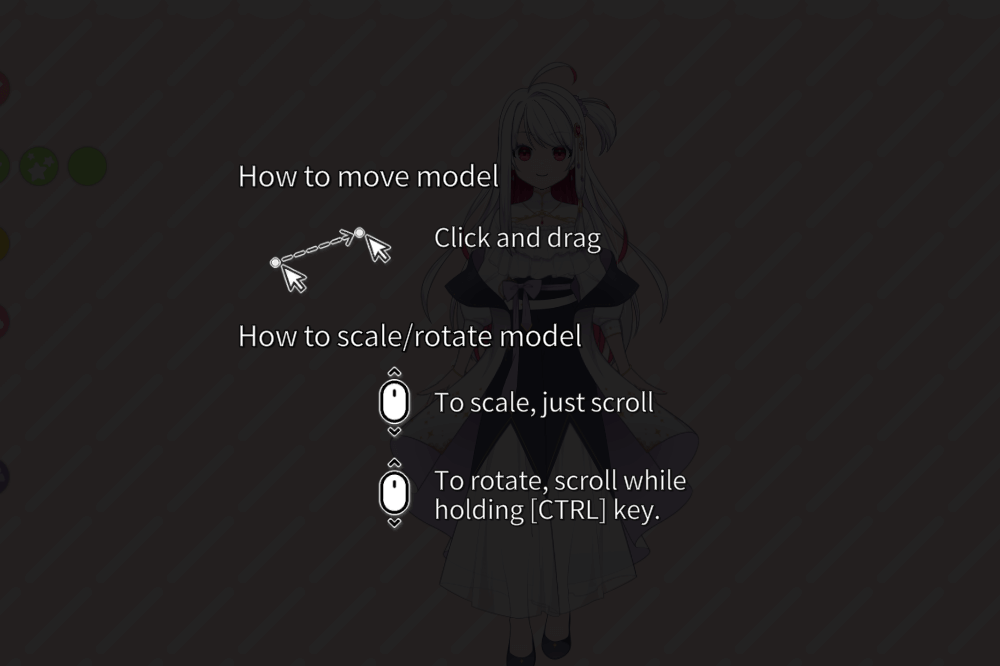
Moving, Scaling, and Rotating Your Model
Streaming or Recording Your Content
To create your stream layout or record videos, you’ll use VTube Studio together with OBS.
Using VTube Studio in Zoom, Discord, and Other Video Call Apps
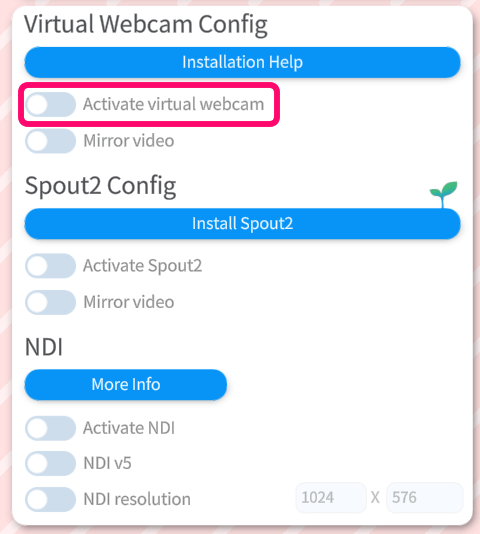
Go to Settings → Camera Icon → Webcam Tracking Settings.
Switch “Virtual Webcam” → ON.
Leave VTube Studio open in the background.
Then launch the video call app you want to use (Zoom, Discord, etc.).
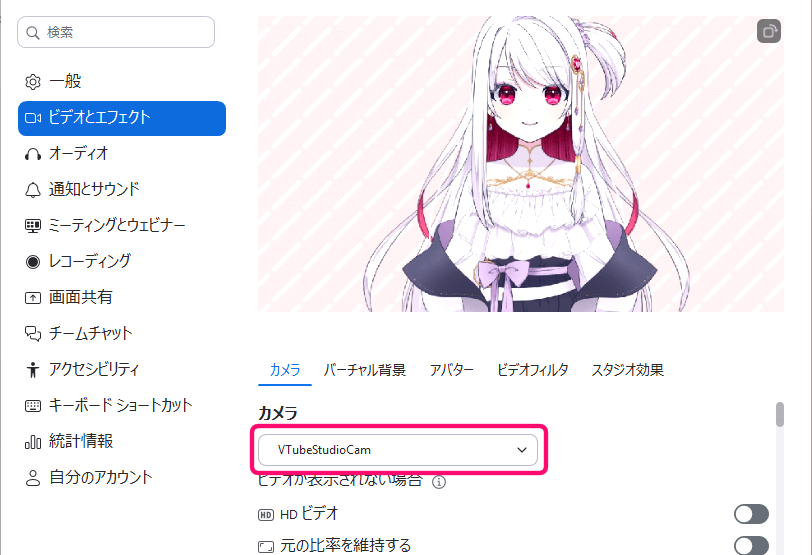
Select “VTube Studio Cam” in Your Video App
Once selected, your VTuber model from VTube Studio will appear as your camera feed.
This allows you to use your Live2D avatar seamlessly during online meetings and calls.
How to Do Collab Streams in VTube Studio
If you want to collaborate easily with other VTubers, VTube Studio’s Collaboration Feature makes the process simple.
I’ve put together a full guide on how to use it here.
Taking Selfies in VTube Studio
VTube Studio features a screenshot function, making it ideal for selfies.
It’s convenient for taking selfies for promotional images or thumbnails.
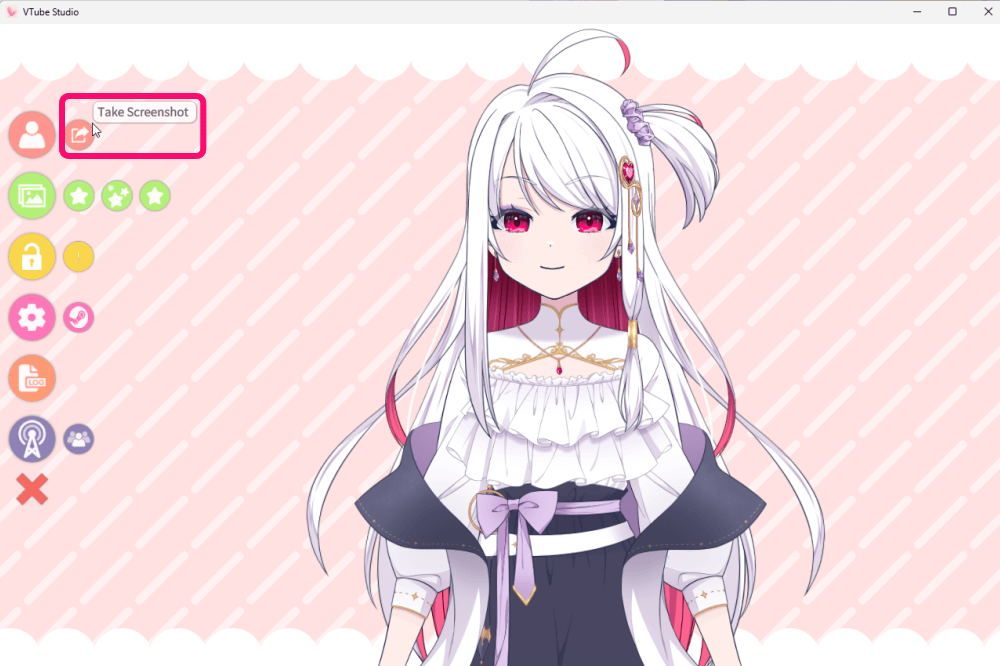
Select “Take Screenshot” from the Menu.
Open the menu and choose “Take Screenshot.”
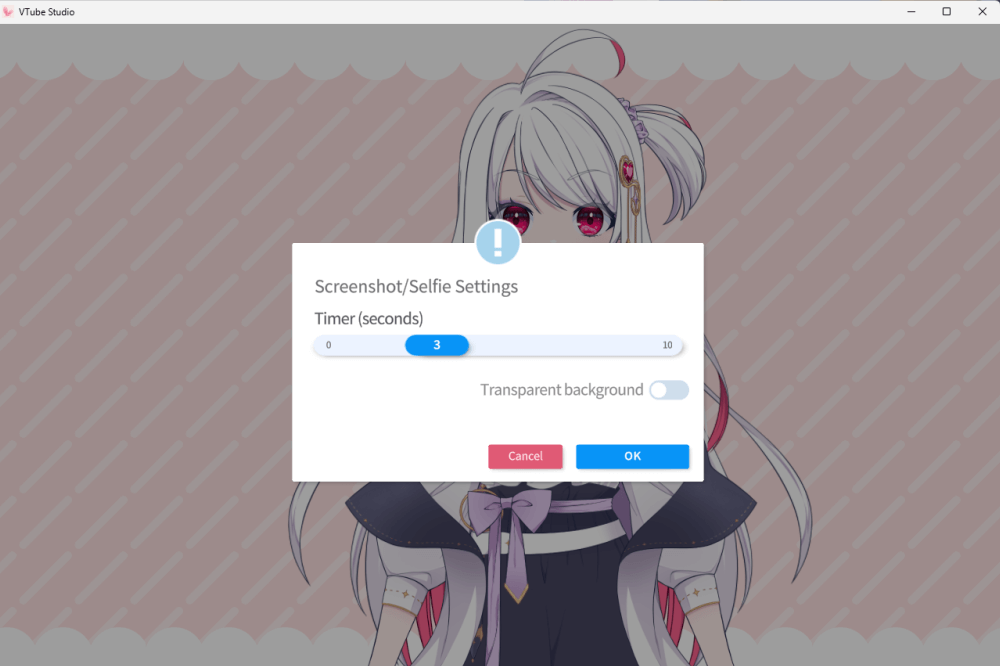
You can set … A timer before the photo is taken, Whether the background should be transparent.
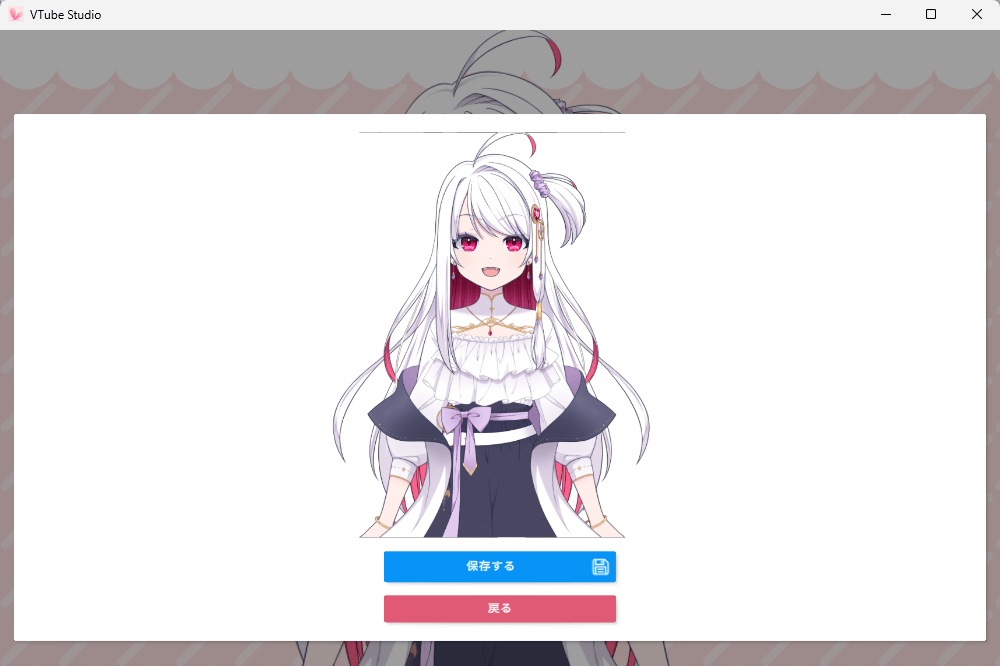
Press “OK” to start the countdown and capture the image.
If you select “Transparent Background,” the resulting image will be much easier to edit or composite in your art software.
How to Change Your Model Icon
When selecting a model, having no icon makes it hard to tell which one is which.
So it’s a good idea to set a custom icon in advance.
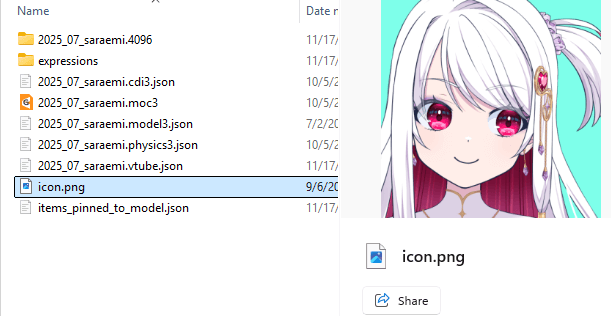
Place your icon image file inside the same folder as your imported model data.

Then follow these steps …
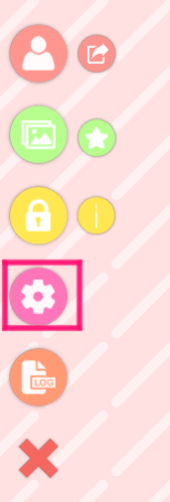
- Click the gear icon
- Click the person icon
- In the top-right corner, click the “No Icon” placeholder
- Select the image file you placed in the folder earlier
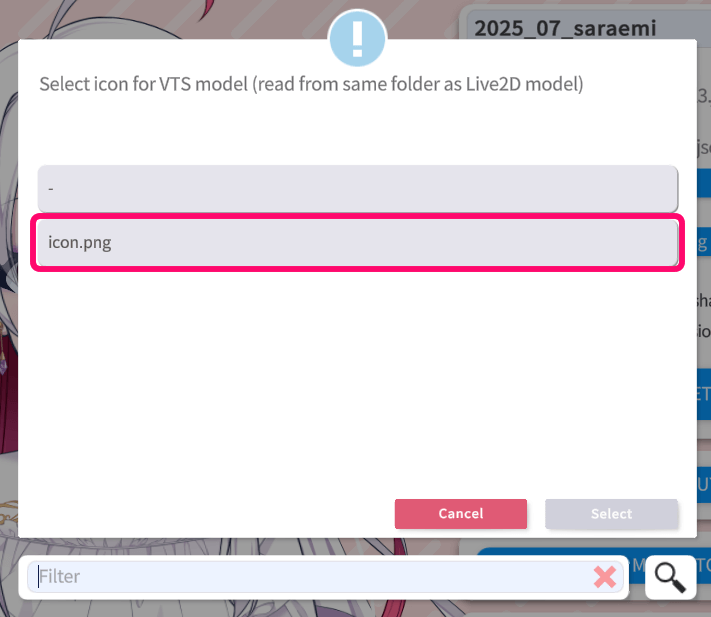
Your chosen image will now appear as the model icon.
VTube Studio Settings Overview
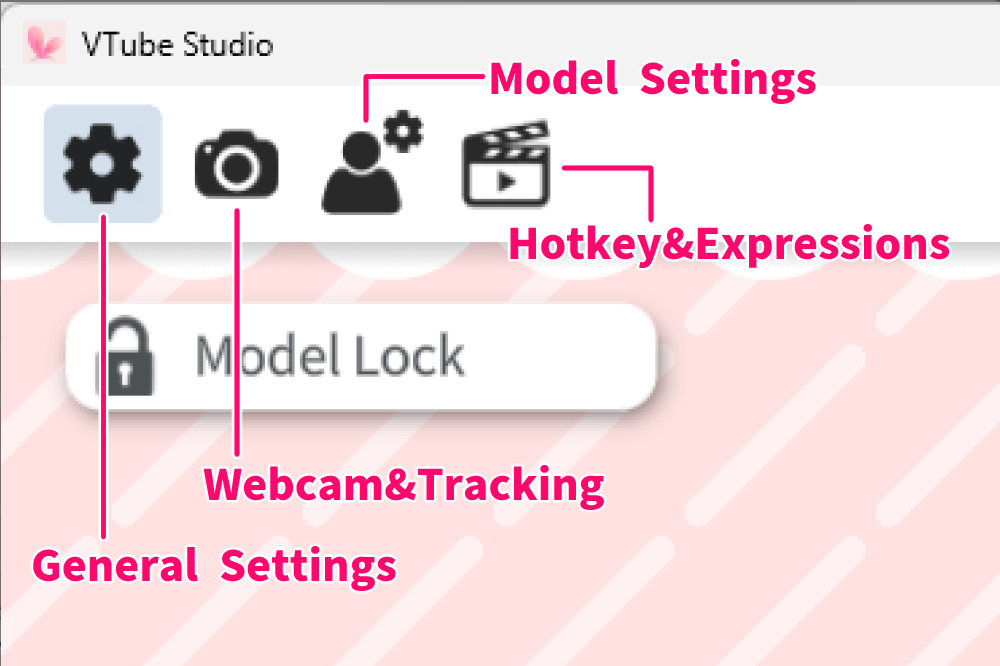
Clicking the gear icon opens the settings menu shown in the figure above.
General Settings: Logo Toggle, Connection Options, and More
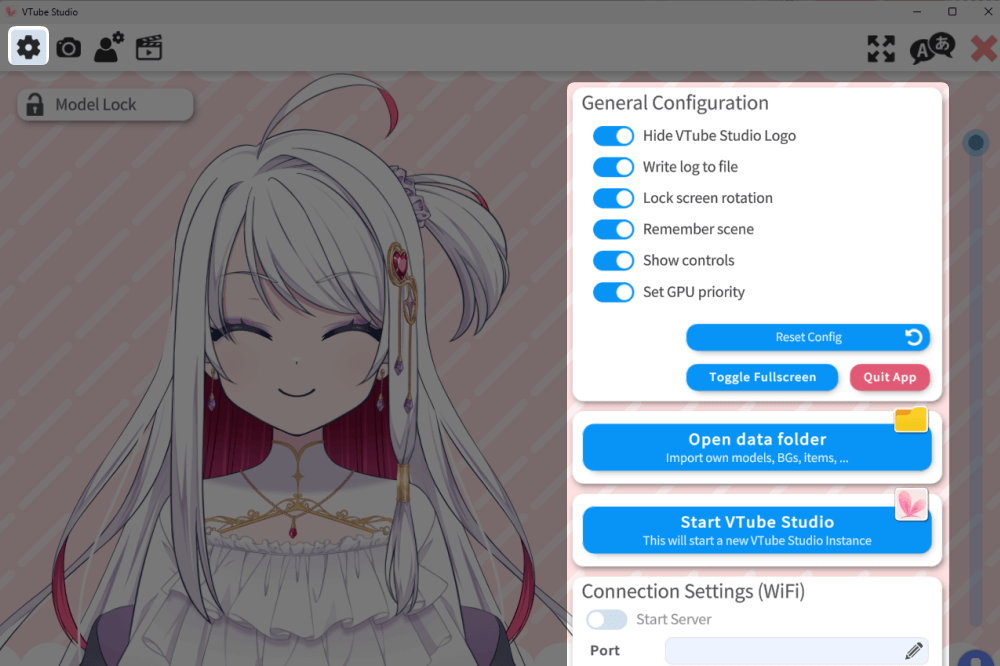
Under General Settings, you can configure the main behaviors of VTube Studio, such as …
- Turning the VTS logo watermark ON/OFF
- Choosing how the software connects with your camera, microphone, and other features
- Adjusting startup preferences
- Enabling or disabling specific interface elements
These settings allow you to customize your overall VTube Studio experience.
ロゴの消し方、リップシンクの使い方はこちらで解説しています
Camera Tracking Settings: Adjusting Camera Resolution and Sensitivity
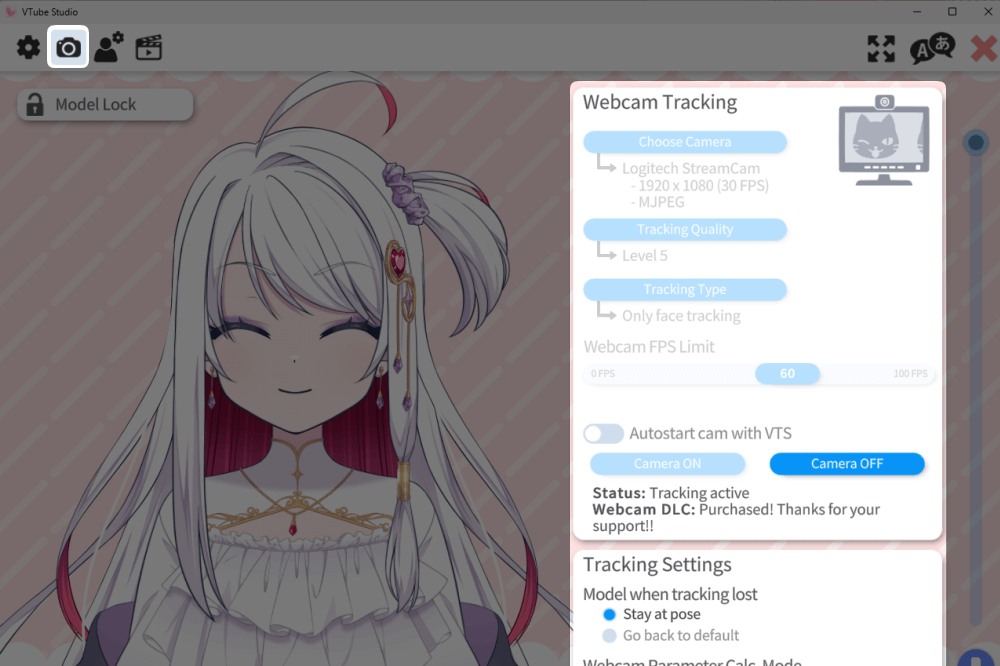
Here, you can adjust your camera settings.
Details of the “Camera Tracking Settings” options
| Name | Description |
|---|---|
| Webcam Tracking | Choose your camera and decide whether you prefer higher accuracy or lighter performance. |
| Tracking Settings | Adjust the sensitivity for blinking and mouth-movement detection. |
| Quality Settings | Configure frame rate and resolution. Generally, 60 FPS or 30 FPS works well. |
| Virtual Webcam | Settings for using VTube Studio through other software such as OBS or Discord. |
Model Settings: Fine-Tuning How Your Model Responds
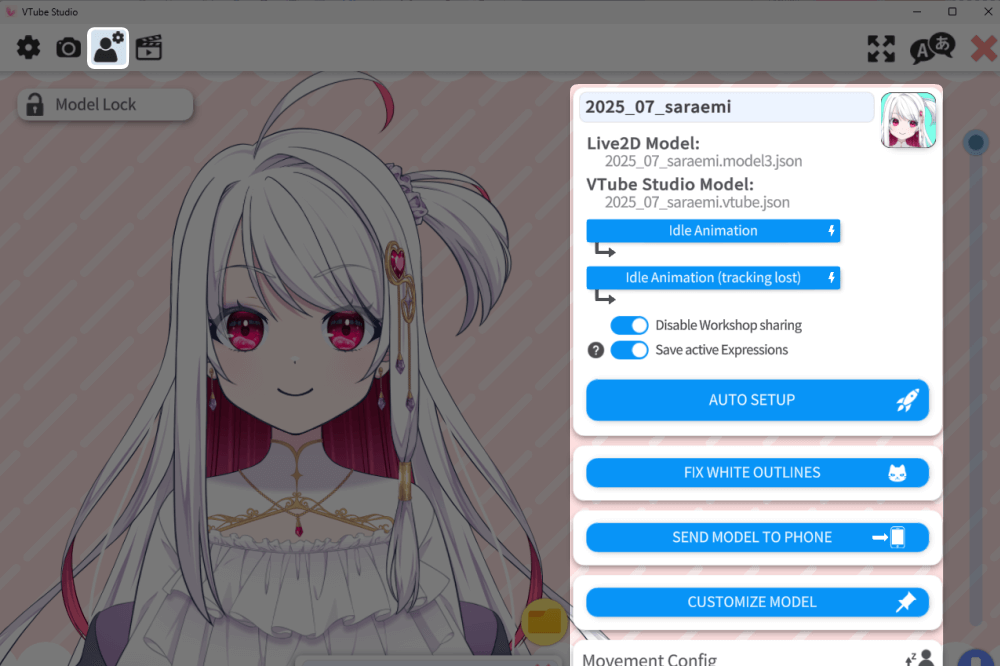
Here, you can fine tune how your model reacts and links to your camera.
Using Automatic Setup will automatically connect the camera input to your model.
Details of the “Model Linking Settings”
| Name | Description |
|---|---|
| Automatic Setup | Automatically links your Live2D parameters so the model moves based on the camera input. |
| Fix for White Outlines | Some high-resolution models may display a white outline; this option corrects that. |
| Movement Settings (Gachi-koi Distance) | Adjust whether the model also reacts to forward/backward movement. |
| Physics Settings | Adjust how physics simulations are applied to your model. |
If you have small parts that behave unstably, you can adjust them here.
However, changing these settings without understanding them may cause unexpected issues, so it’s best not to modify them unless you know what you’re doing.
Any adjustments you make will be saved to the imported model data and will remain applied the next time you load the model.
Blinking, eye movement, and other common adjustments are explained here.
Calling Up Expressions, Motions, and Items: “Keybind & Expression File Settings”
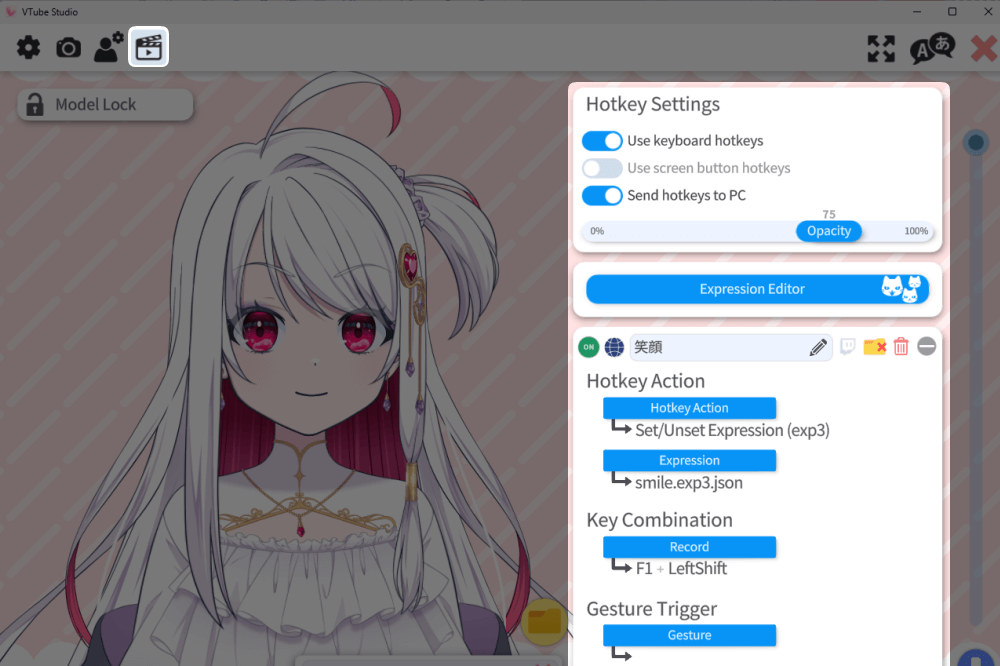
With Keybind Settings, you can assign specific expressions and reactions to certain keys.
Keybind settings require expression or motion switch files such as “◯◯◯.exp3.json” or “◯◯◯.motion3.json.”
Although VTube Studio can create expression switch files…
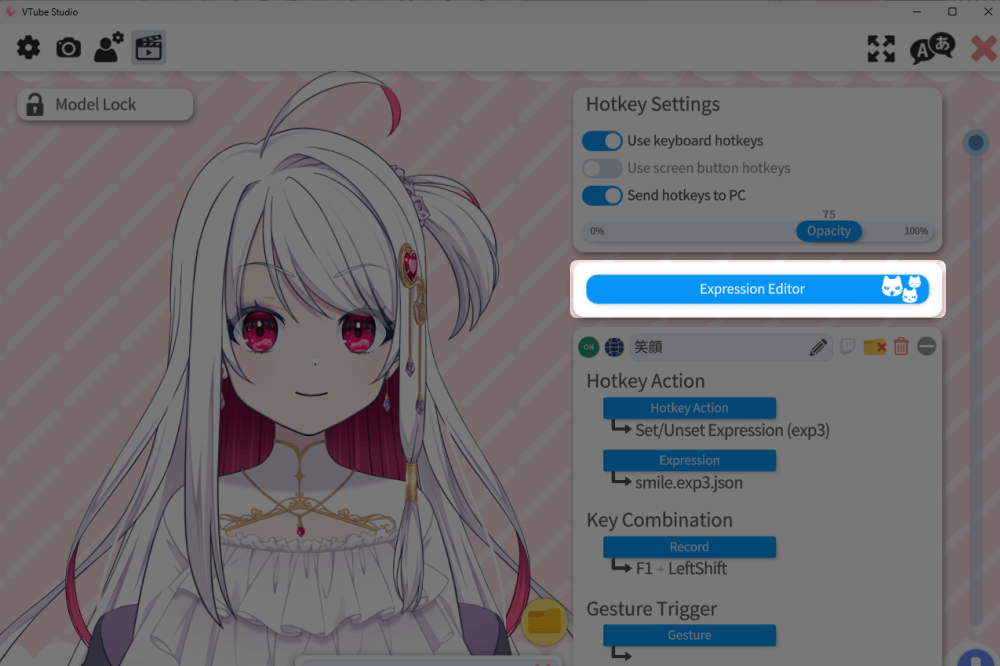
You can also create “.exp3.json” files using the Expression File Editor.
However,
There is a risk of overwriting data originally created by the model’s creator, so caution is needed.
To ensure you can restore everything quickly, always make backups of both your original model data and the imported model data in the destination folder.
How to Set Up Keybinds
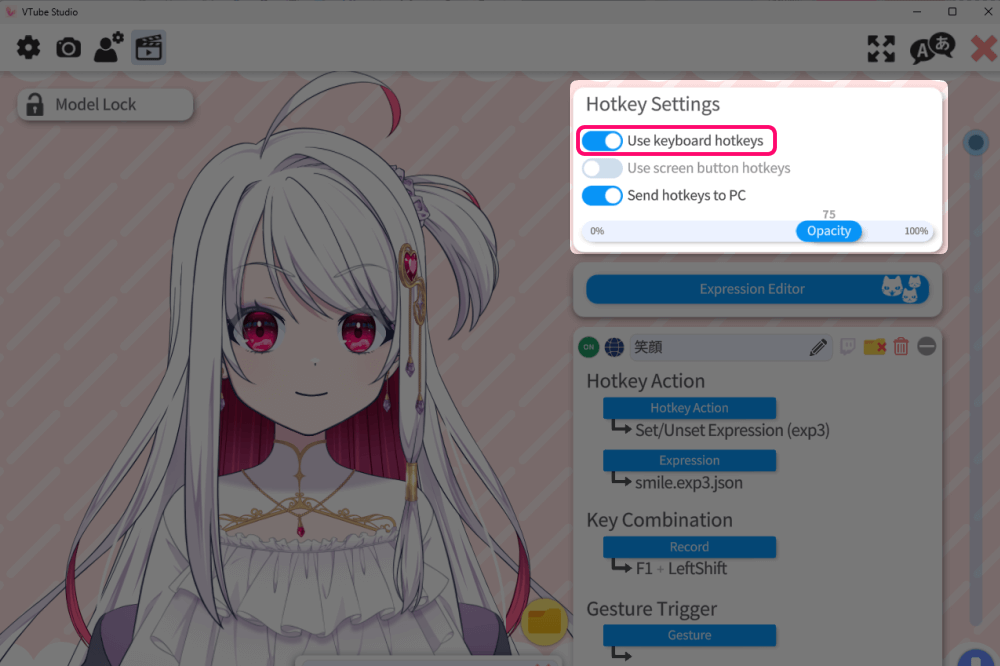
First, turn on “Use Keybinds.”
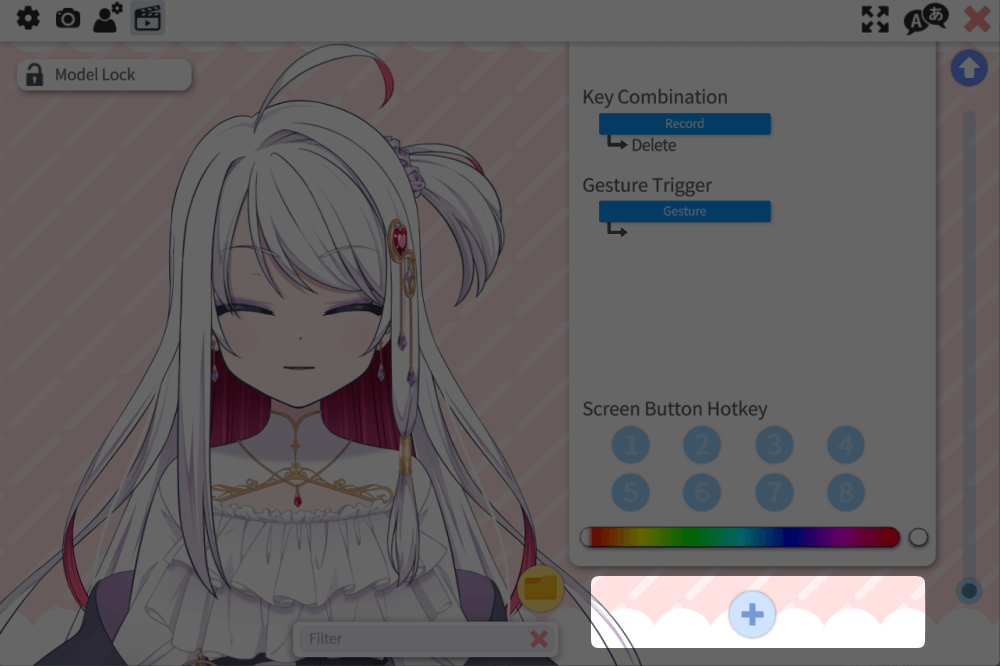
When you click the “+” button below…
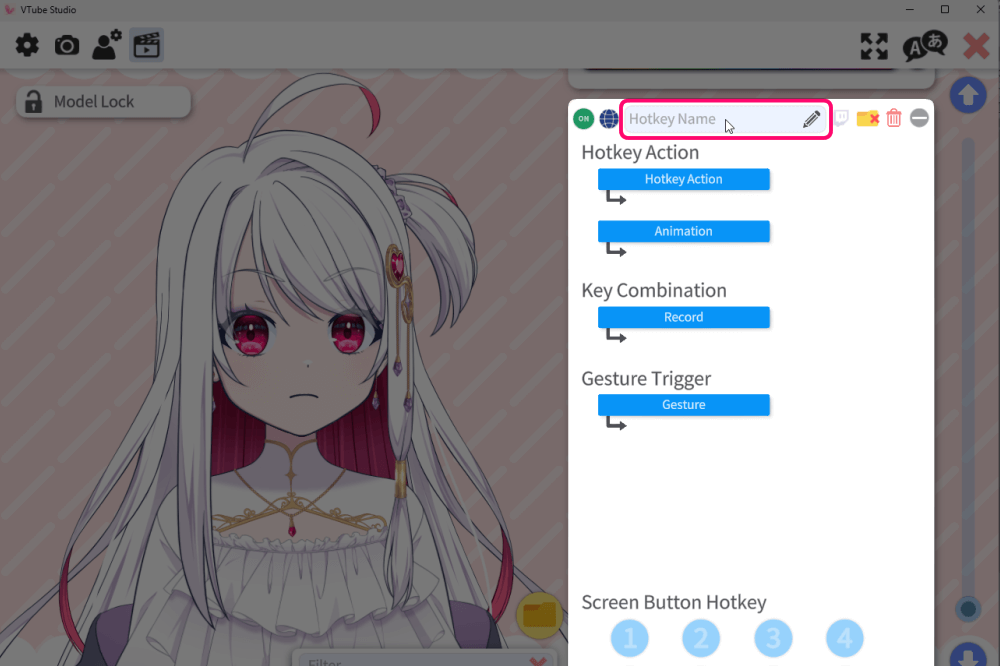
A settings panel will appear.
Start by entering the name of the expression, motion, or item you want to activate.
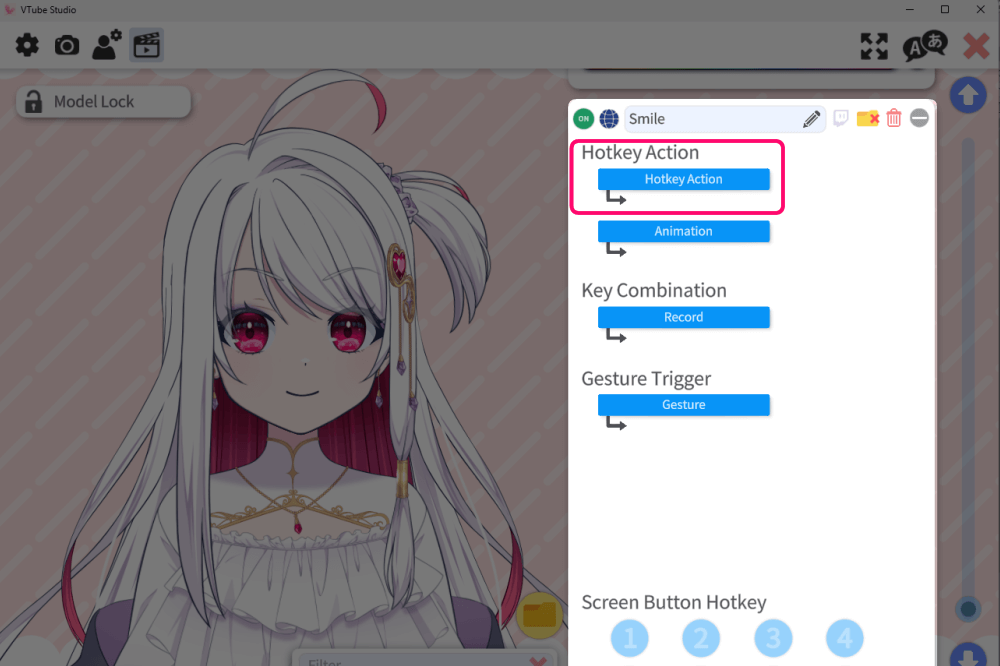
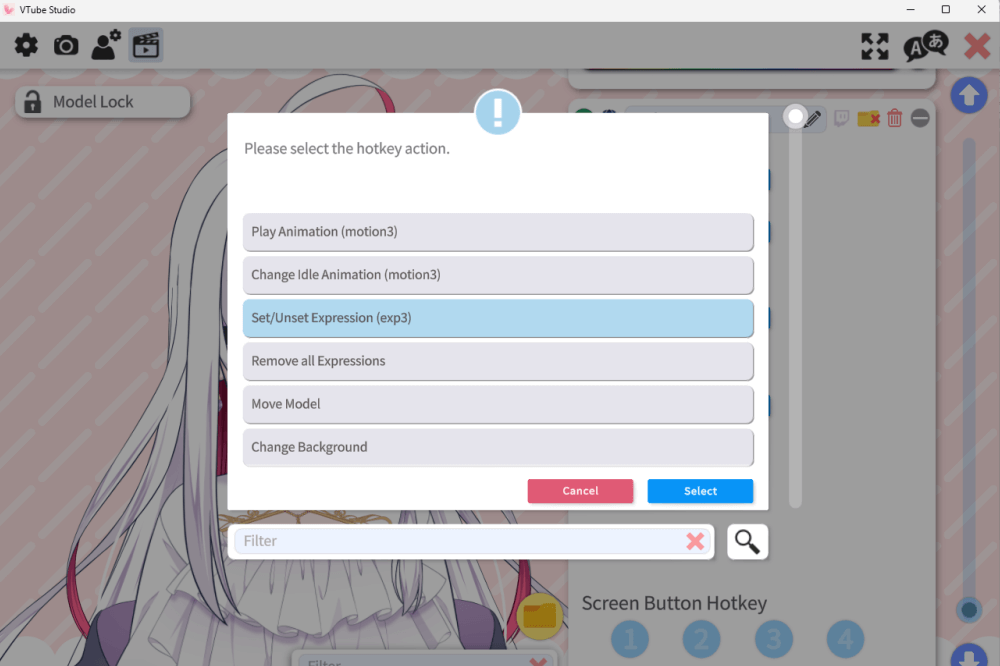
In Action Type, you can choose from options such as:
- Switch Expression
(Requires an “◯◯◯.exp3.json” file) - Play Motion
(Requires an animation file like “◯◯◯.motion3.json”) - Change Idle Motion
(Uses a “◯◯◯.motion3.json” animation for when the model is doing nothing) - Clear All Expressions
(Useful for resetting when the model freezes or too many expressions overlap)
…among other actions.
For expression switching, select “Switch Expression (.exp3)”.
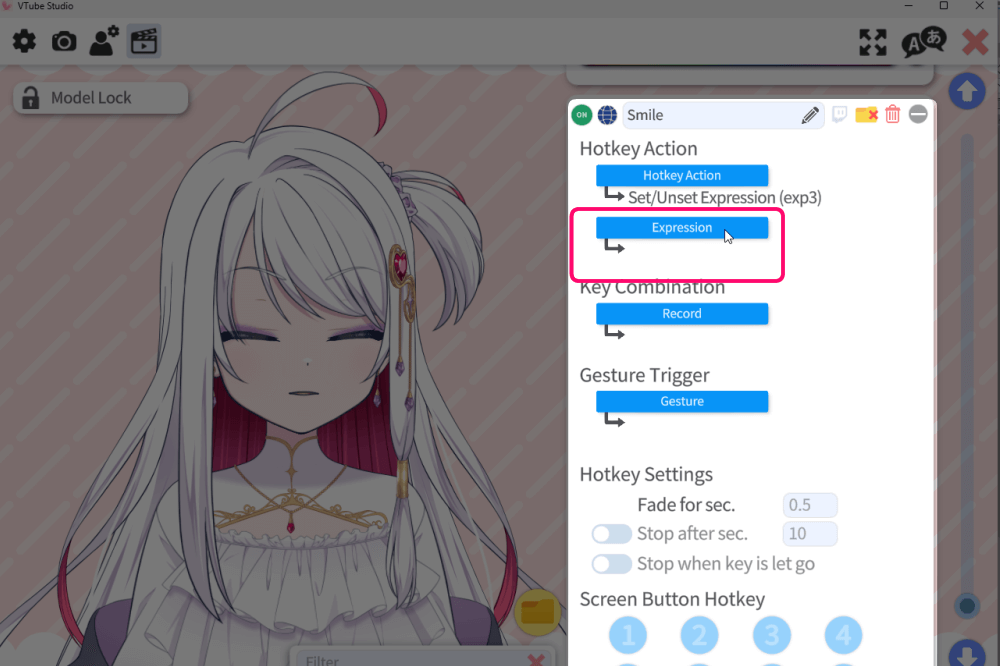
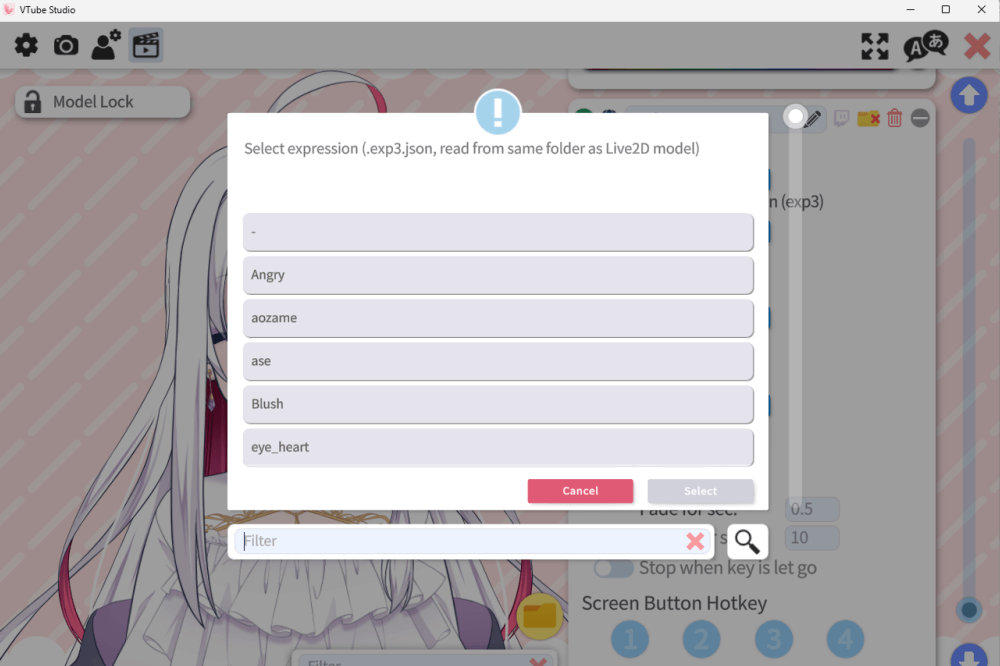
Next, click Motion, and a list of available “.exp3.json” and “.motion3.json” files will appear.
Choose the file you want to trigger.
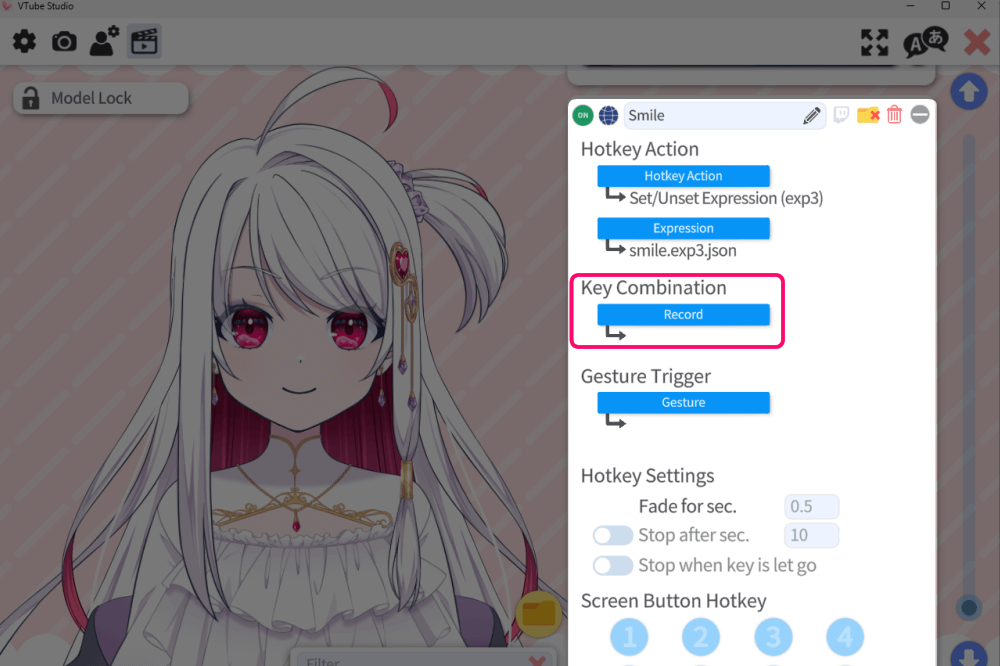
Under Key Combination, you can assign which key(s) will activate the action.
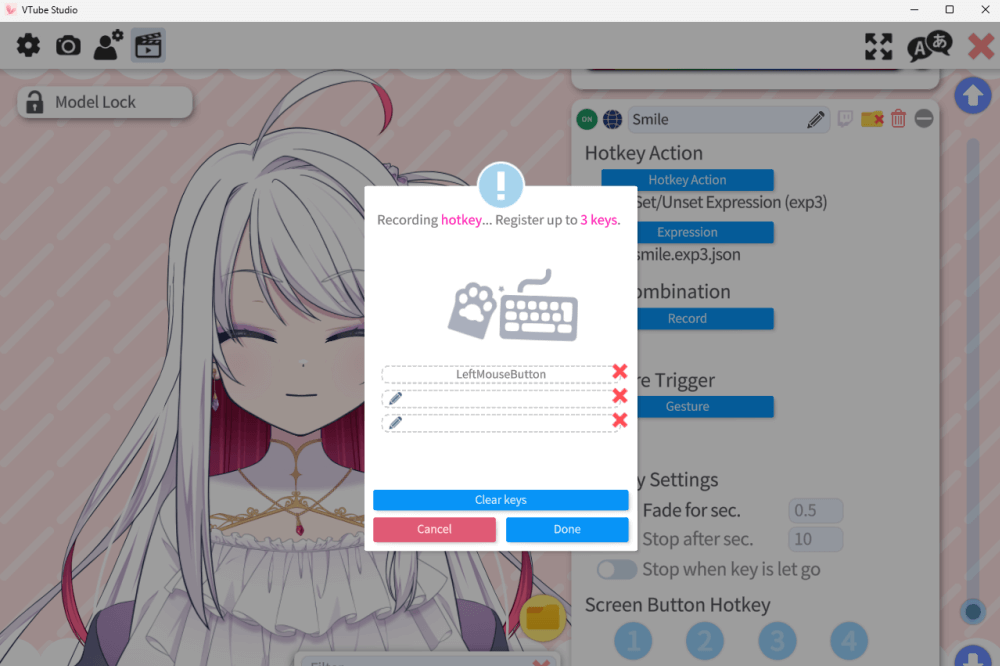
Pressing that combination on this screen will set it as the shortcut that triggers the motion.
This completes the setup for switching your desired expressions, motions, or items.
Hand Gesture Switching
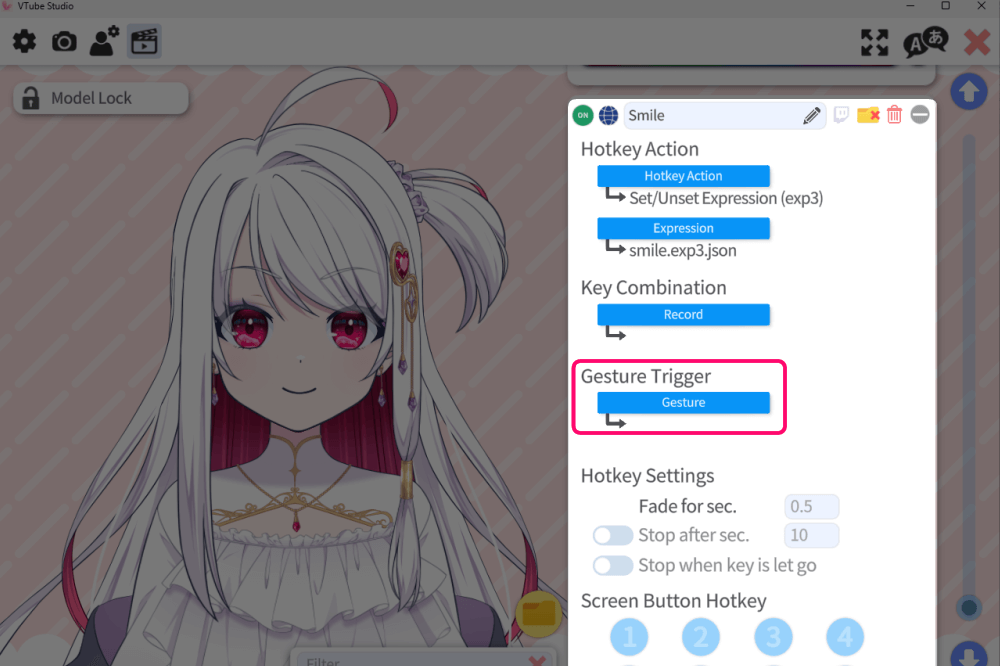
VTube Studio also allows hand gesture controls, letting you trigger actions through hand shape or movement.
Use “Control with Gestures” when you want to activate something using hand gestures.
Since recognition can be unreliable and usage is limited, the explanation here will be kept brief.🙇
Using VTube Studio for Commercial Purposes
For individual commercial use, you need to purchase at least one DLC.
The official team also mentions this in their X (Twitter) post thread.
Because the DLC is a one time purchase, it’s a very cost-effective way to use the software.
For corporate commercial use, you must contact the official team and obtain an additional license.
Please check the official website for detailed terms and conditions.
Common VTube Studio Errors and How to Fix Them
Here is a link covering frequent early-stage issues such as unintended blushing or the mouth not opening while talking along with their solutions.
For Additional Settings, See the Official
Thank you for reading to the end
I hope this overview helps you enjoy a smoother and more comfortable VTuber experience!
In addition to creating VTuber models, I also provide illustrations for main visuals, MVs, merchandise, and more.
If you’re interested, feel free to contact me through VGen or the contact form.